HSC FoV Check with Aladin
1. Download HSC Instrument FoV file
2. Download and install Aladin desktop program
- http://aladin.u-strasbg.fr/java/nph-aladin.pl?frame=downloading
- One can also use on-line Aladin if your brower is supporting Java plug-in.
3. Start Aladin by clicking the icon 
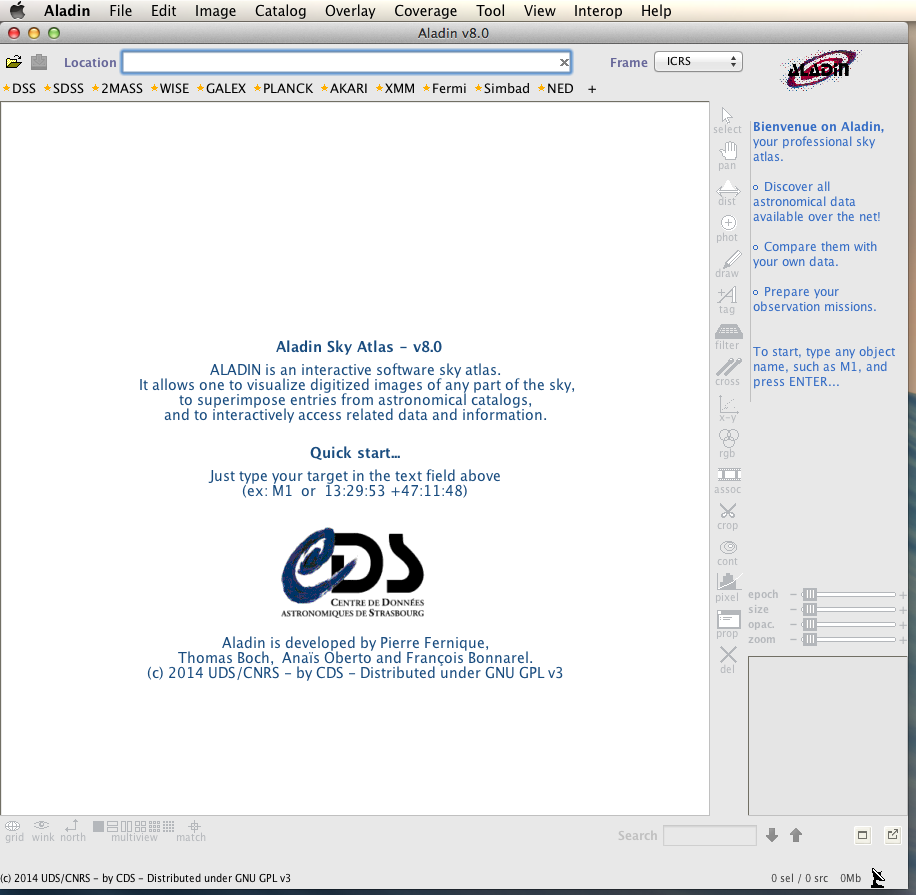
4. Input your target name or coordinates in Location field window at the top
The following example is for M33.

Aladin will resolve the target name (M33) into its coordinate and display the image of DSS colored as the default.
You can also choose a server from DSS, SDSS, etc.

5. Load HSC instrument FoV file
-
Choose
File/Load instrument FoV...in main menu.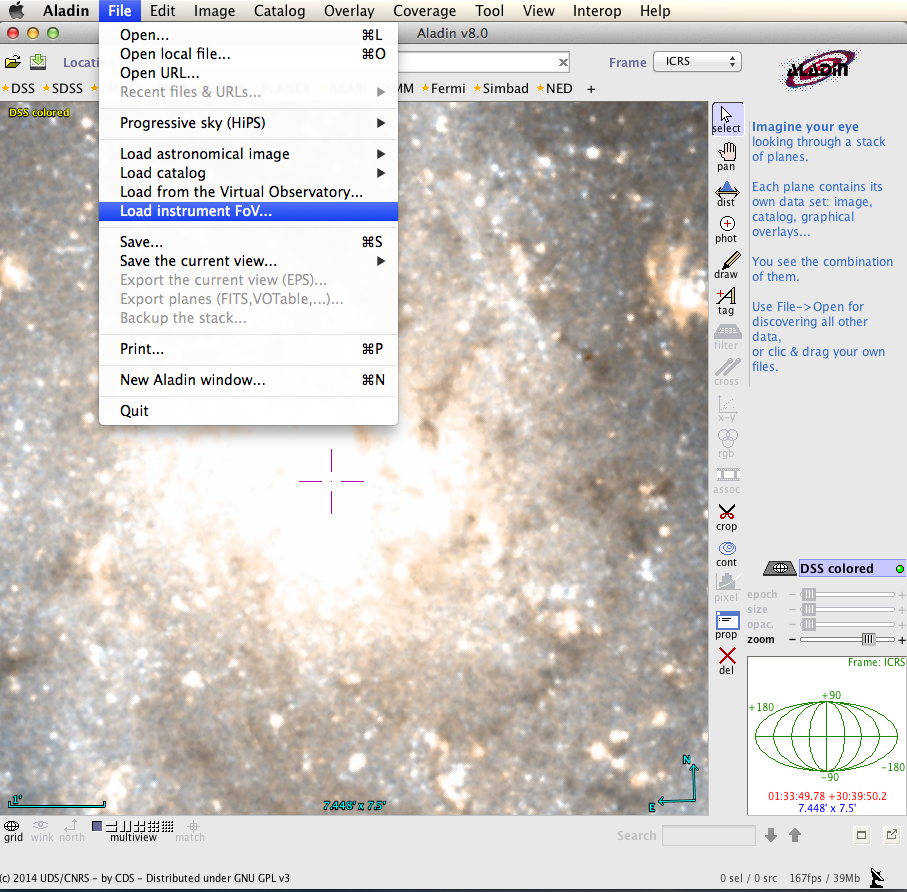
-
Push
Load it...button at the bottom ofFoV ...tab inServer selectorpop-up window.
-
Select
Subaru_HSC_FoV.xmlin your folder and pushOpenbutton onAccess to user data by filename or URLpop-up window.
-
You can find the
Subaru_HSC_FoVon the top of the list as follows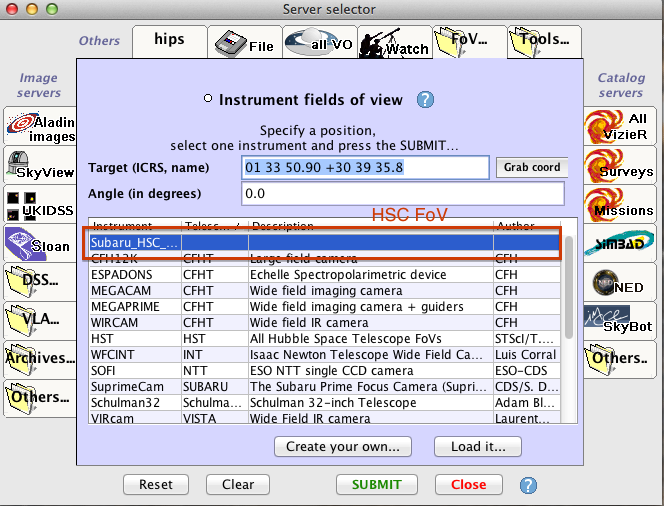
6. Zoom out the image and check the Current position and Angle of FoV.

7. Display the HSC FoV on the Current position with Angle (= 0.0 deg)
Push Submit button on Server selector window.
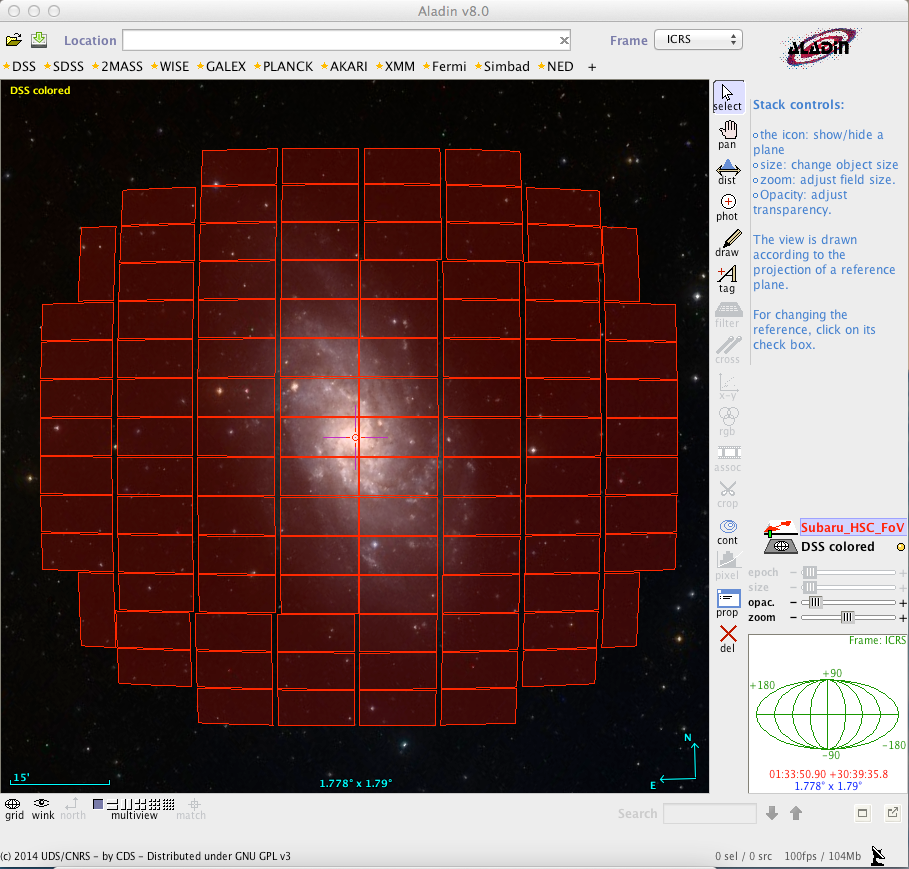
8. Adjust the HSC FoV
You can rotate and move the HSC FoV with draging around the Current position mark (green 5 dots).
- To move FoV, grab the center green point and drag your mouse (The mouse pointer turns to a hand shape).
- To rotate FoV, grab the green points around the center and drag your mouse (The mouse pointer turns to a rotation arrow mark).

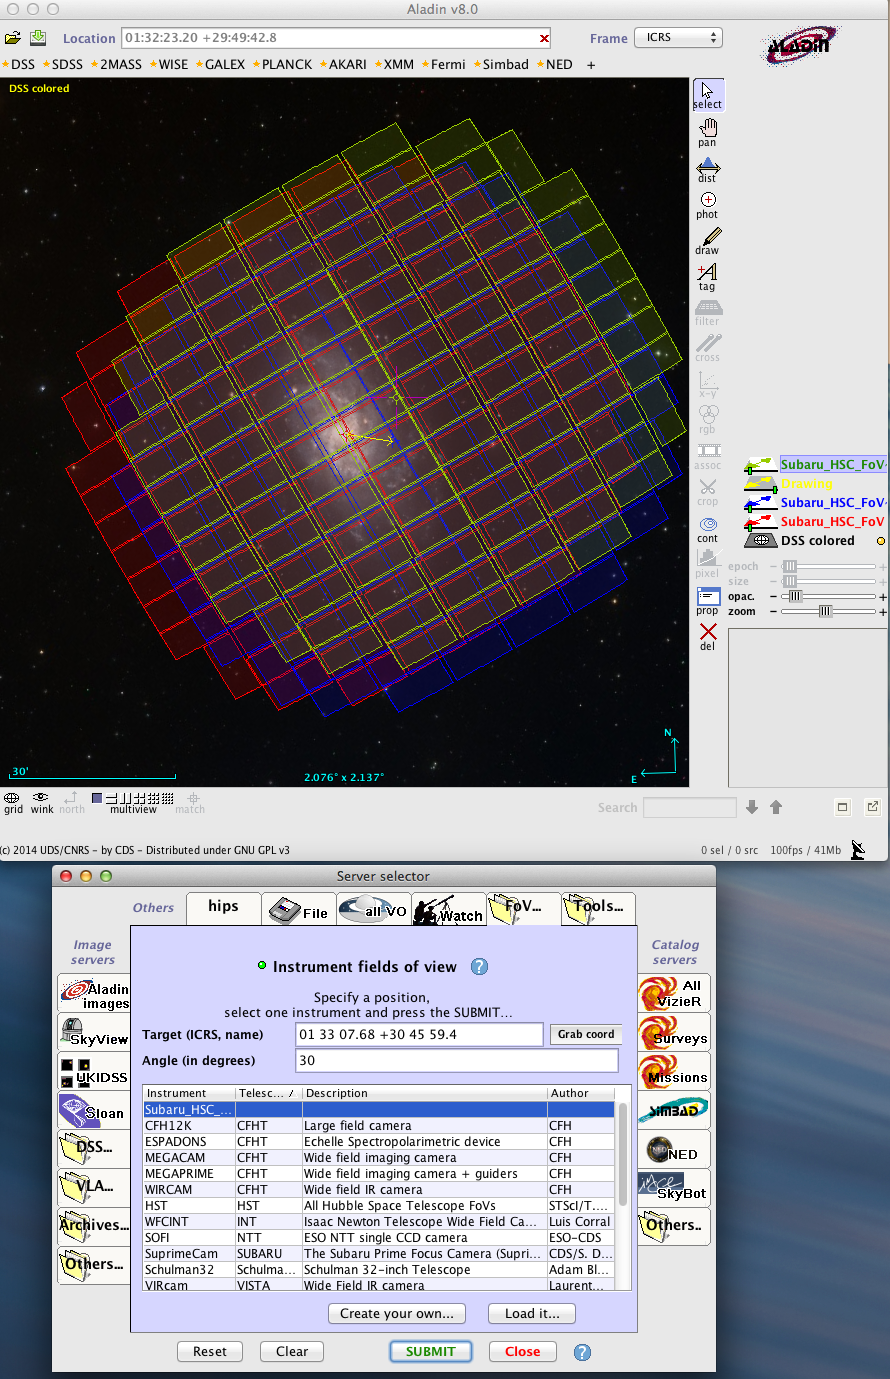
9. Example: Set Angle=30 and three dither positions
- First, delete FoV with
Angle=0- Select
Subaru_HSC_FoVat the right side (set active layer). - Push
X deleteicon on the right of the image.
- Select
- Set
Angle=30inServer selectorwindow. - Push
Submitbutton inServer selectorwindow. - Check the FoV displayed over the image.

Display FoV at the 2nd position
- Click the 2nd position, then the
Targetcoordinates are changed to that of the 2nd position. - Push
Submitbutton. - Check the FoV at the 2nd position.

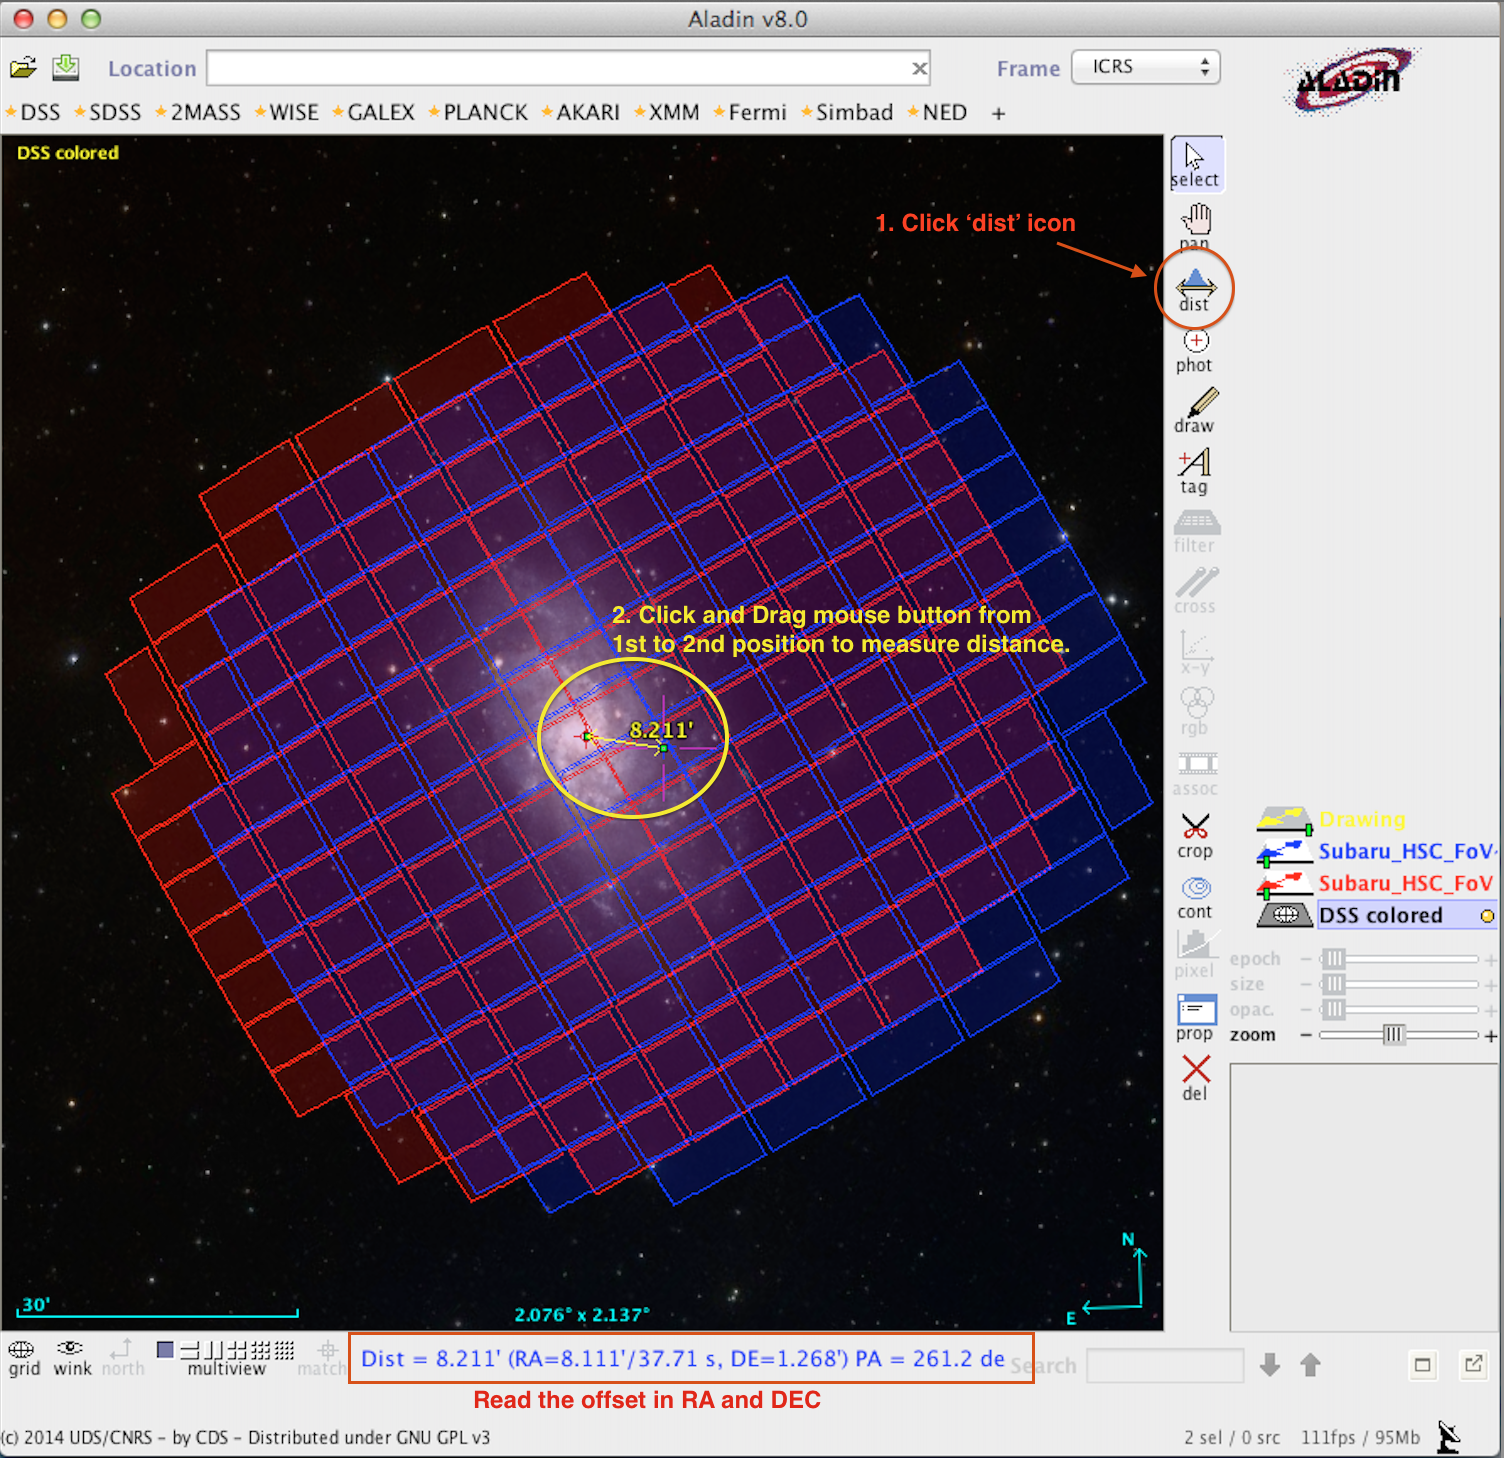
Measure the offset between the 1st and 2nd FoV
- Click
disticon on the right side of the image. - Click and drag the mouse button from 1st and 2nd position.
- Read the offset and position angle.
Add the 3rd position with FoV