|
Show content only (no menu, header)
Glass slumping mold
Requirements
Ideally, the mold should have the following properties:
- The mold has to be either machinable or castable into a mold (mold for the mold !) which is itself machinable.
- The mold should maintain its shape up to the slumping temperature, and also resist multiple cycles of heating/cooling
- The mold should be both strong and light, so that I can carry it around and put it easily in the oven. Another advantage of the small weight will be the energy savings (takes less energy to heat up the mold - electricity is quite expensive in Hilo, and I like to think I'm not hurting the environment too bad !!!)
- The mold material should be cheap
- The mold material should be strong so that I don't risk breaking it during "normal" handling. Ideally, the compressive strength should be ~20MPa (note: 1 MPa = 145 psi) or 2900 psi or more, and should maintain high strength at high temperature. For comparison, usual cement is 16 MPa after 1 day and 41 MPa after 30 days.
- The mold should preferably have a good thermal conductivity
While I was not able to find a solution which meets simultaneously all criteria, a silicon-carbide refractory concrete worked quite well.
Mold making process
The steps are:
- Pour a plaster blank
- Machine the plaster blank to the shape of the mirror (rough machining)
- Paint the plaster blank with wax, roughly 2mm thick
- Precision machine the wax on top of the blank
- Pour the silicone carbide refractory mix onto the wax
- After the silicone carbide refractory has hardened, detach it from the plaster by heating (melts the wax)
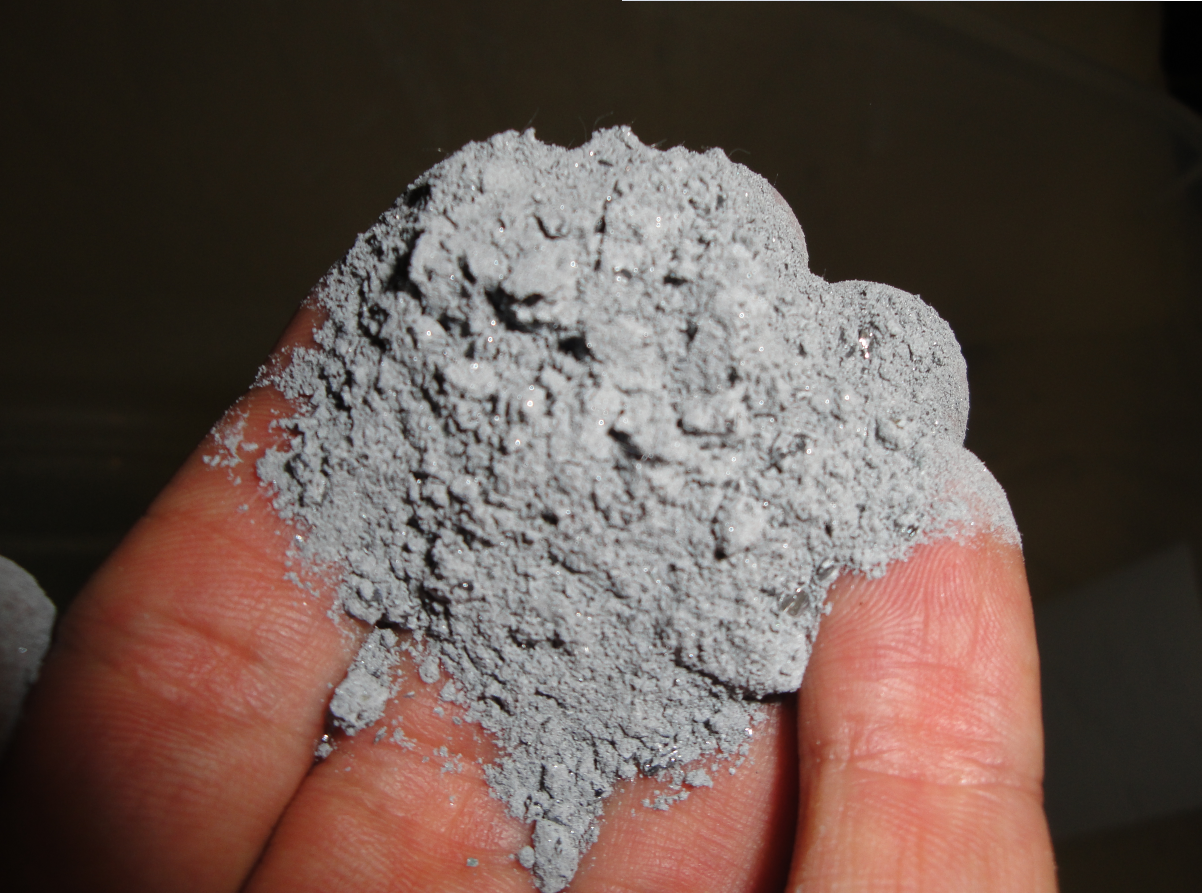 |
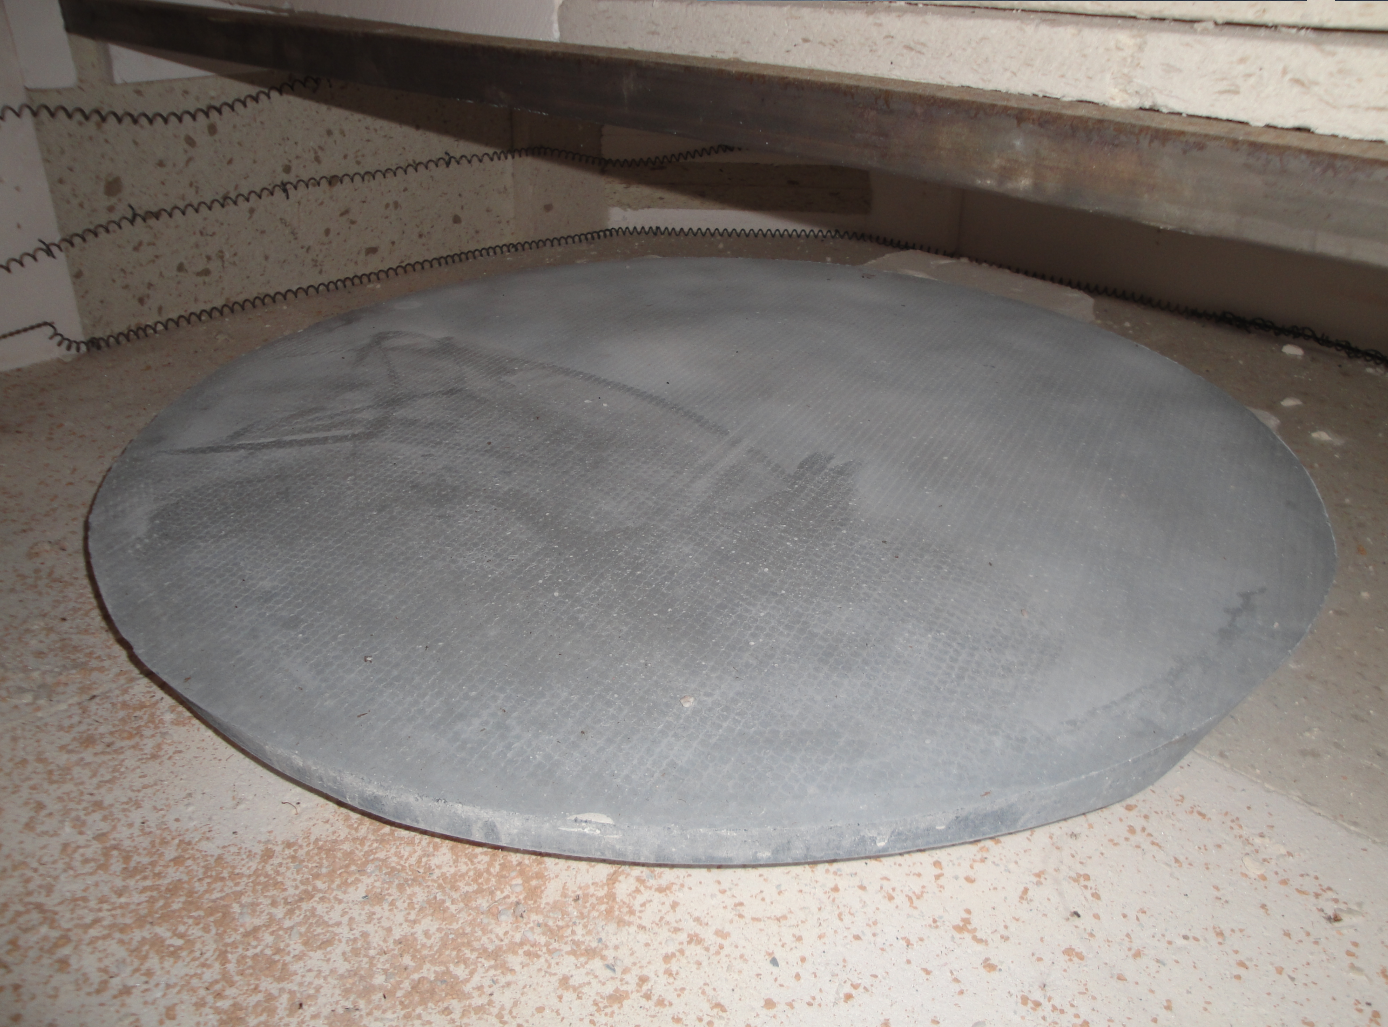
SiC refractory concrete used to make the slumping mold.
|
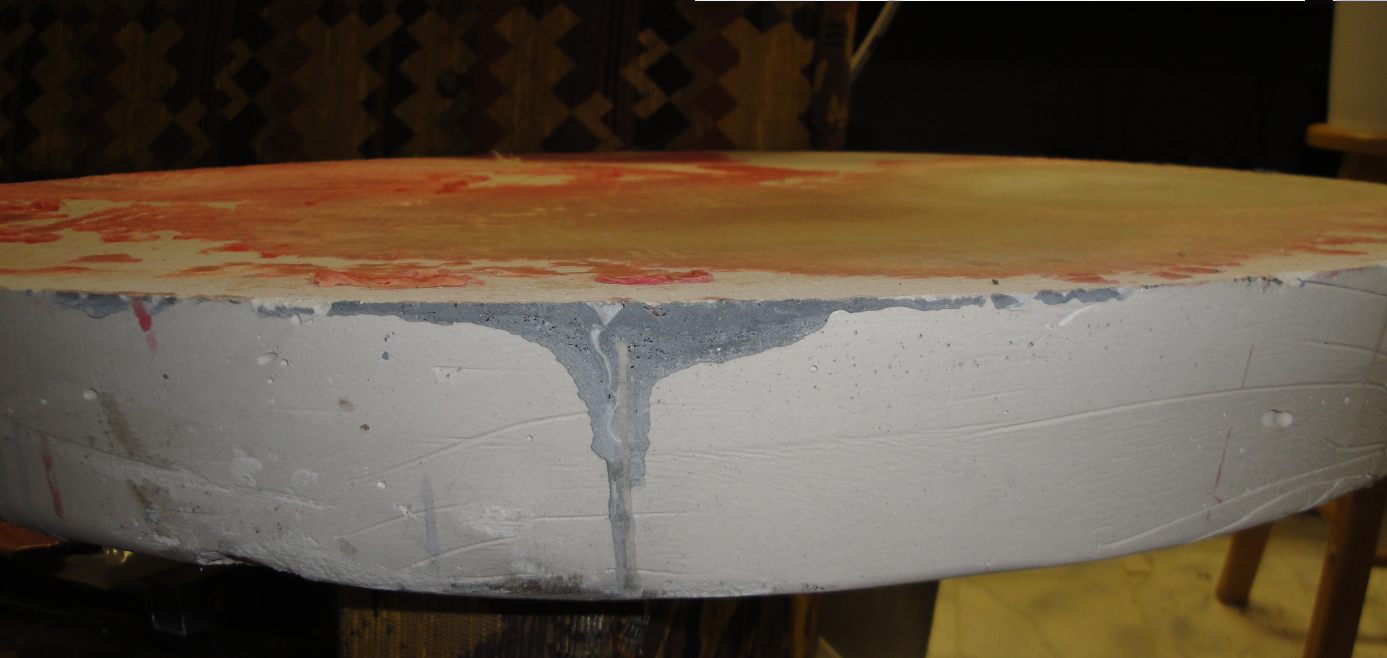 |
Plaster blank after the SiC mold has been separated from the plaster (side view).
|
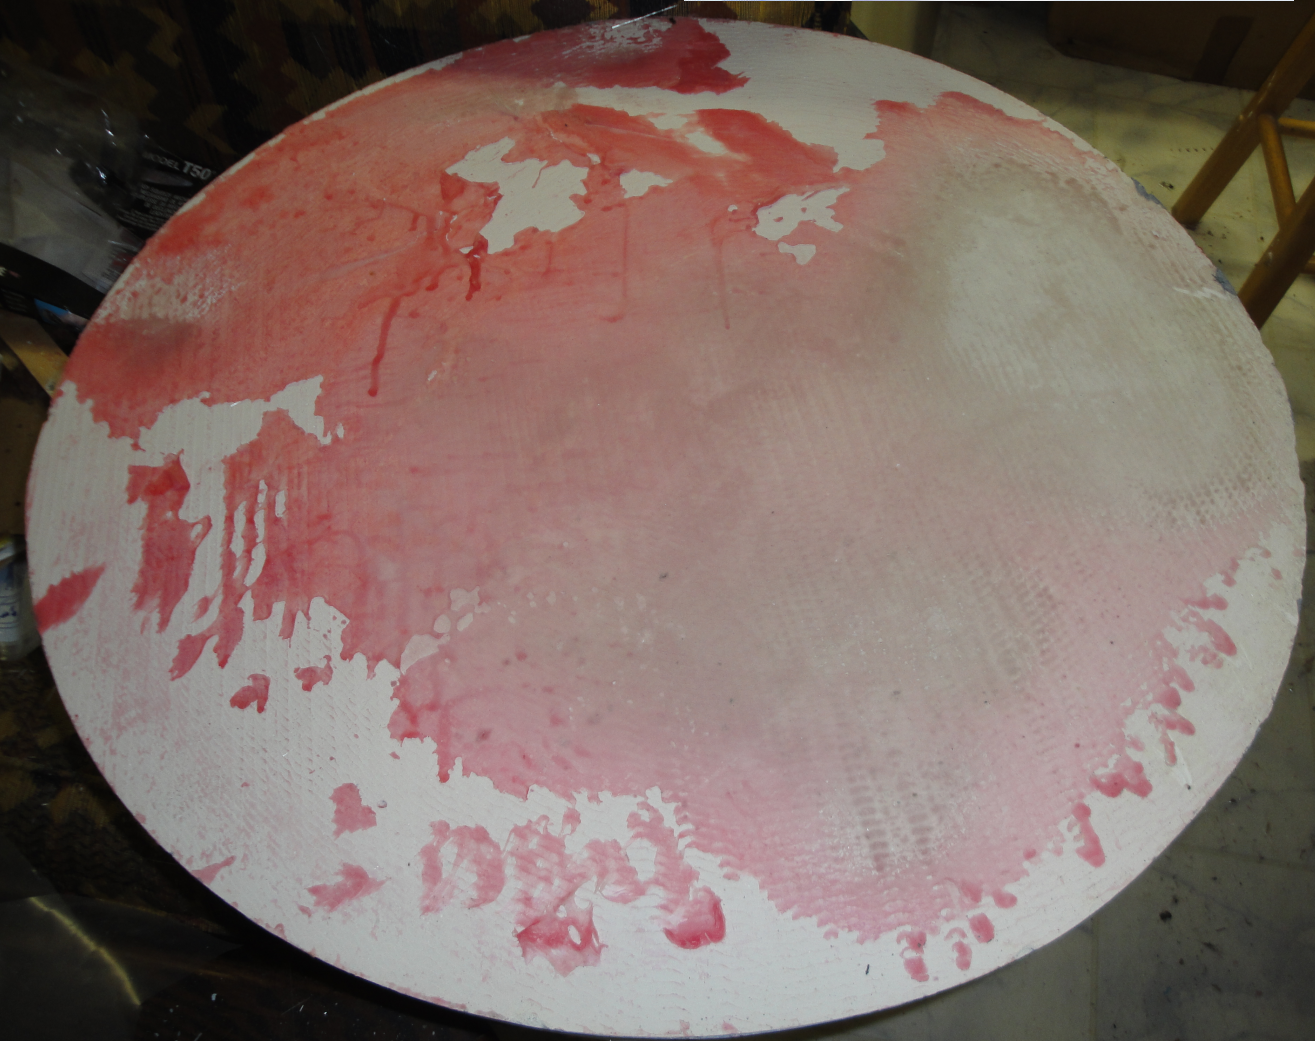 |
Plaster blank after the SiC mold has been separated from the plaster (front view). The red melted wax can be seen on top of the blank.
|
Sluming the glass
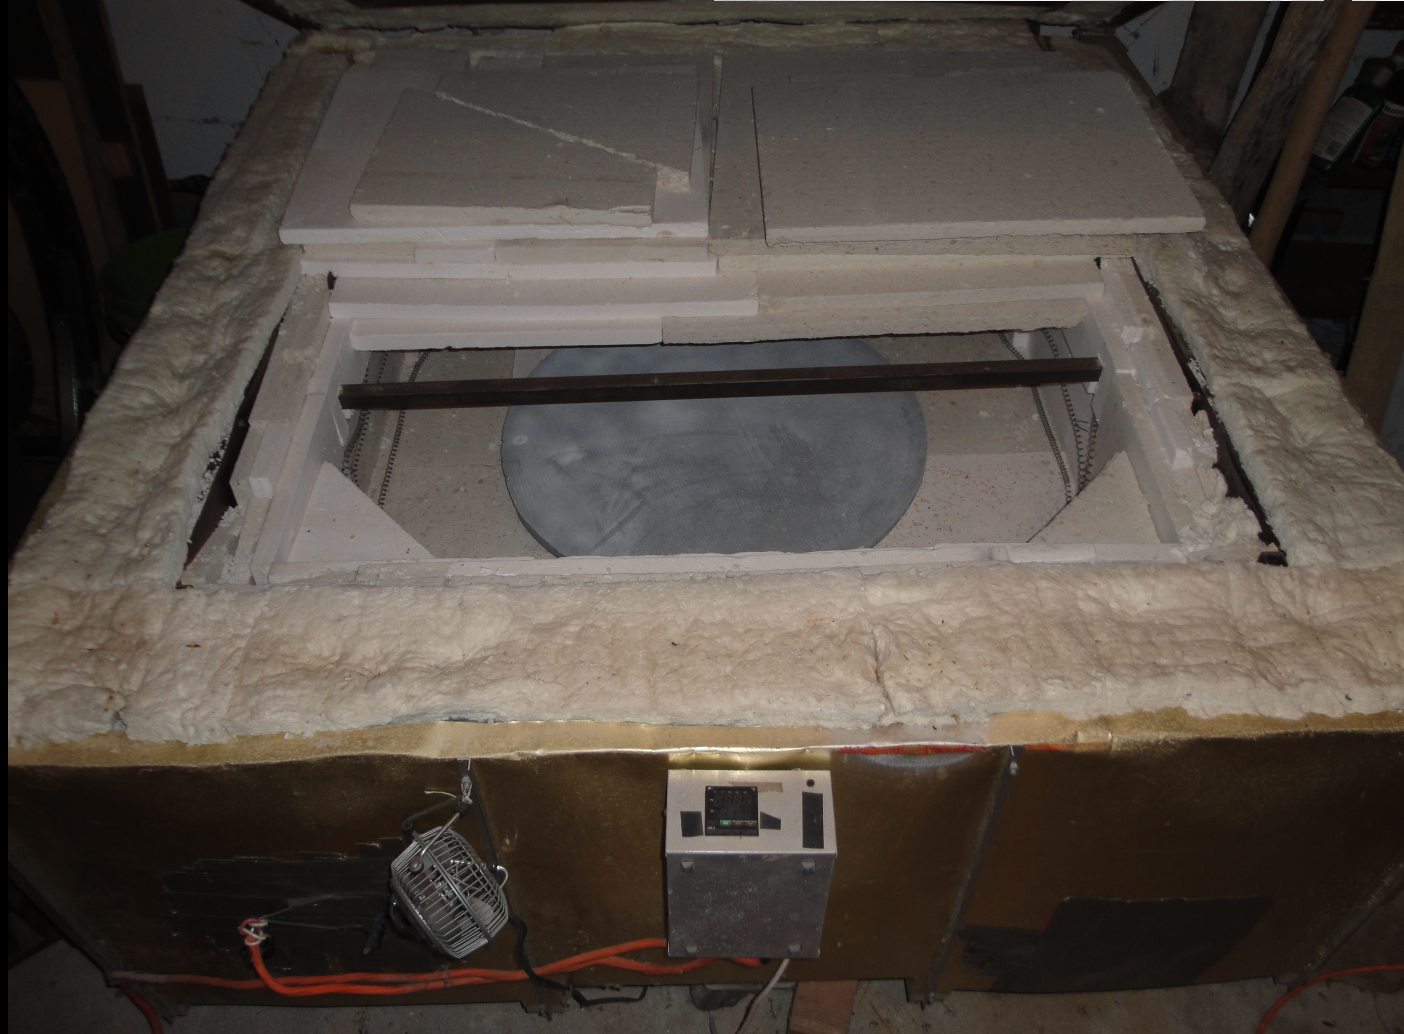 |
SiC slumping mold inside the oven (wide view).
|
 |
SiC slumping mold inside the oven.
|
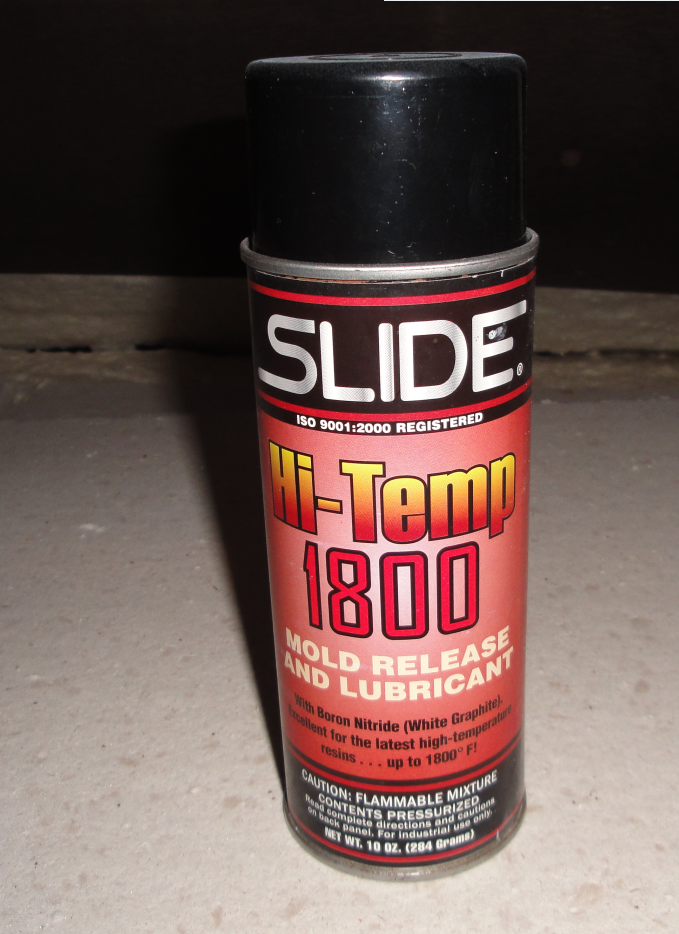 |
Boron Nitride is sprayed on the mold to avoid having the glass stick to the mold.
|
Failures: Materials I tried which did not work well
Plaster-based materials
Summary: plaster-based materials may be a good option for small molds (less than ~0.5m), but is not really a practical solution for large molds.
I wasted a lot of time trying plaster-based materials, with little success. I was initially attracted by the low cost and the fact that plaster is widely available. Even though plaster does not meet a lot of the requirements listed above, I tried to make it work because it didn't cost much, but I really ended up wasting a lot of time, and also, given the many attempts, quite a bit of money.
"Pure" plaster (plaster of Paris) really didn't work: it just doesn't handle the heat and cracks very very easily.
I bought some "Sheetrock 90" plaster-based material at the local Home Depot and I was very pleasantly surprised: unlike plaster of Paris, it resisted heat pretty well. My plaster-based mold efforts are described here .
Modeling Clay (Laguna Clay EM-210)
Clay did not work well as a mold as it changes shape when you heat it. The first time it is heated, it shrinks a lot. I did not pursue this option, although in principle, it may work with the right kind of clay, and if you grind the mold after it is fired.
Rutland Refractory cement
I bought a small bucket of Rutland refractory cement from the local Ace hardware store. It is a thick yellow paste that (I think) is water based. There are some small fibers embedded in the paste to give it extra strength. This stuff is intended to do small repairs in furnaces, and I discovered pretty quickly that it is not suitable to build a large mold:
- It is very thick and you can't pour it, so making a large blank is not easy (the closest analogy I can think of would be to try to shape cold ice cream into a large thick disk - you can do it, but it's not easy)
- When you make something thick with it, it takes FOREVER to dry. I made a single slab, about 3cm thick, and even after two weeks in a "dry room" (room with a dehumidifier), only the surface had solidified, and you could not pick up the slab without having it starting to sag and break.
Some refractory material notes .
Page content last updated:
27/06/2023 06:35:52 HST
html file generated 27/06/2023 06:34:42 HST
|
